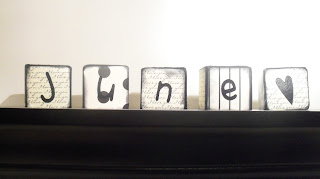
So I decided to create their last name on the block and this is what I came up with.....
(no their last name is not JUNE but I thought I would keep it annonymous :) )
The ideas are endless for these blocks. Weddings, kids' names, holiday decorations and much, much more! Just chose the style of paper to coordinate and voila'!
So ready to make your VERY OWN memory blocks???
You will need
2in wooden blocks (found in the unfinished wood @ your local craft store)
paint if you choose to paint the blocks (I chose charcoal)
scrapbook paper (the thin paper works better)
scrapbooking glue
Ink
Modge podge
stickers or lettering (I used my cricut cutter)
So here is how I made mine.....
I started with the plain ol blocks and painted them charcoal.
Then I punched out squares with a square punch that would fit the blocks and then rounded the corners (you can cut these with a scrapbook trimmer also) .
Next, I put a THIN layer of glue on the paper and covered 5 sides of the block (I did not cover the bottom of my blocks). If you don't cover all the sides you must make sure that the style of paper you want is in the front. Since I was making this for a wedding present I used the couple's picture off the invite for the front side of the end block.
Next, I used my cricut cutter and the "making the grade" cartridge to cut out the letters I needed. I made my letters 1 1/4in and then ran it through my xyron create a sticker.
I inked the edges of the paper on all sides for an antique kind of look.
Lastly, I painted a moderate layer of modge podge on all 5 sides of the block and placed them on styrofoam plates to dry (newspaper will stick).
Now bundle them up for a cute gift or go put them on that empty shelf!
I'd love to hear what kind of blocks you made in the comments section!


No comments:
Post a Comment